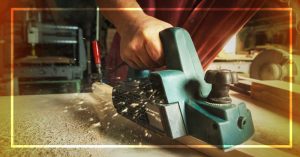
 There are a number of chores that a power hand planer can do. These tools are really handy to save time in any kind of project. They are great at framing lumber or smoothing out edges. Also, they can do handrail chamfering nicely. Some experienced users will also be able to perform belting door edges with it.
It is quite alike to jointer for the usages. These can be both handheld or stationary type machine. And, if you are working on a wide board, there is no better option than using a handheld power planer.
Sometimes using stationary power plainer for wide boards will be a little tricky. So, using a power hand planer can be a perfect tool for a wider board.
So, today we’ll know how to use a power hand planer on wide boards.
Simple Steps on How to Use A Hand Planer
Set-Up Board
01
To start with the planning process, you need to set up your board nicely. It needs to be done in a certain way to get better results. You should get a flat surface. The surface needs to be huger than your board.
02
You should find an area where the board could be supported. Somewhere high would be ideal for it. It should not rock when you are cutting the wood.
03
When you are dealing with the cupped board, make it convex. You should keep the bend upward so that there is no rocking movement at all.
04
You need to mark all four edges with a marking gauge. So that the high spots are visible. This is to make sure the board is even between both ends. One part should not be higher than another.
Power Planning Process
01
Now the marks you have made earlier will help for power planning. It should be down to those marks.
02
You can simply use a winding stick here. This will help you to fine-tune the amount of flatness needed to make your board.
03
You should always flatten the board in several phases. This will be aiding to release tension from the wood. Also, it can give a slight change to the overall shape.
04
Something close to 75 percent of wood removal would be a good choice. This needs to be done on each side, however.
Waiting Period
01
You need to wait for a while before going to the next process. This waiting session could be one or two days long. This actually depends on the type of wood board you are using. It needs to settle well.
02
Don’t think about skipping this process. It needs to settle down before finishing the flattening.
03
However, if it’s absolutely not possible to wait so long, then go ahead. The shape will not be full as it should be, however.
04
Waiting will give you a certain amount of break from the workshop also. This will give those shavings mixing with your breath a halt.
Sand Process
01
Now, after the flattening process, time for sanding it up. Many if you would think it as an extra hassle. However, this can give the piece a better finishing, it’s recommended. The feel and look will be so much better.
02
You can use a wide-belt sanding machine for the process. This is probably the best choice to give an excellent sanding to your piece.
Tips for Better Results
While making full pass over the piece you need to be comfortable. Be sure to keep your feet steady at the process.
You can use the front soleplate or shoe on wood. Your blades do not need to rest in wood. Now simply start the device. The motor should come with full speed. You need to relive the plane into wood.
You should apply same hand pressure over the tool throughout pass. This will help to keep your tools steady. This will be used positively when you work near the end of a piece. Even pressure means you’ll be able to cut aligned.
You should always prevent overreaching. This means letting your blade go through the other side of wood. Also, this means it will take shape at the end of wood. Especially when front show drops off the end. This is why it’s important to apply the same amount of hand pressure.
Speed and depth are also an important issue for how your final product will look like. How fast you put the setting is important. Same goes for selecting the depth of moving. The end result will get impacted by these factors.
You should move the board along with tool gradually. Also, try to make more passes over moving hastily. This will get rid of the problem a lot.
Safety Precautions
To protect your eyes from any wood shavings, make sure to wear proper goggles.
Woods contain harmful chemicals. So, make sure to get a quality dust mask to prevent inhaling anything dangerous.
When you are changing blades, you should ensure the tool is turned off.
Always lock the blades in position.
When using the hand planer make sure to use both hands.
Don’t keep the planer aside with running blades.
The working area should be smooth without any bumps. This will make it work better.
Also Read: Best Door Handlesets Reviews [Stylish & Comfortable]
Verdict!
So, that’s how to use a power hand planer on wide boards. Don’t hurry the process or rush over anything. This process involves evening and flattening. Your little disheartened attitude may bring unsatisfied results.
There are several other ways to try for the process. You may want to use stationary machines too. However, with other processes, the guards need to be removed. This probably will be risky for inviting unexpected injury. Also, you may end up getting an uneven surface finish.
So, choose your process, tools, place to work and safety equipment wisely. It should be a smooth process if you follow the instructions well. Good Luck on Your Projects!