 There are faulty doors that would never stick in place and so these don’t close properly. You need to use force and push them to shut. Sometimes the bind inside jamb becomes an irritating reason for doors not closing at all.
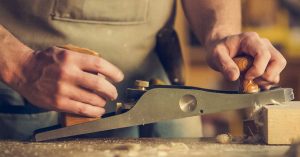
A very easy solution for such issues is planing the door edge. This may be the only solution to get rid of a sticking out problem. Now, by planing I mean eliminating a tiny piece of wood. This needs to be just right enough to make the door clean any kind of jamb existing. As a result, it starts to close properly.
It may need you to remove the door entirely. However, some tools will also help you to avoids such removal step and do the planing easily. Let’s know in details about how to plane a door.
Everything About Planing A Door
What Tools Would You Need?
- Paper or cardboard.
- Pencil
- Straightedge or a Regular ruler
- Doorstop
- Compass that carpenter’s use
- Drill or screwdriver
- Hand planer
- Sawhorses but it’s optional.
1. Planing Wood
You need to find the jamb at door. For that simply open and close it for a few times. It should show you the problematic area. This may not be required if it is blocked at the bottom.
Now you need to use cardboard or paper. Put it between the jamb and door. This will help you to notice the starting and ending point of that high spot.
Now use a pencil and mark the points well. You should mark them on side not edge of the door.
Use a ruler and pencil to draw a line between those two points. This way it will become easier to notice the planning zone.
This most of the time is a short length. However, sometimes the entire edge needs to be shaved off. If it’s the second situation then you need to use a carpenter’s compass.
Use the compass point and pencil tip to be apart about 1/8 inch from each other. Now using vertical edge of door, run a straight line between the point and jamb.
You need to make sure the full-length cut is symmetrical. So, make sure to do so for both sides of the door.
You need to calculate about 1/8 inch up from the surface if you are shaving from bottom to accommodate flooring.
2. Removing from Frame
There is no need to remove the entire door from frame if you see slightly raised section. It could be removed without the need for door removal from frame. However, if you want the max control over planing process, taking off door will be better.
Use a drill or screwdriver to take off the door from its hinges. Do it with care and attention, the process should not make any kind of frame damage.
You should keep the adjustable edge facing yourself while turning door. Use the space between your legs to hold it. This will help you to plane easily at high spots from above.
To make a full-length trim, you need to remove hinges. Do it from the back and take wood from door’s hinged edge. So that there could not be any detachment required for latch hardware.
You can simply lay it flat across two sawhorses when the need to remove inch at top or bottom comes around.
Many will question in this step about how to plane a door with electric planer. However, I believe, using a circular saw will give the most out of it. Even better than a hand planer.
3. Trimming Flow
You should trim following the wood grain when you are working on vertical edges. However, for the horizontals, start from outside edge and go towards center each time.
You should be very light with the step while trimming. Always try to put light pressure with the planer. This will help you to not gauge wood more than necessary. You may grow back hair because of a bad haircut, but that is not possible with mistaken woodwork.
If you need to get rid of more than 1/8 inch, use some electric planer for the step. Also, a belt sander will do the right job here. However, make sure to have better control while using these tools. Power tools will need careful proceeds. Otherwise creating visible faults and gauges will be unavoidable.
4. Fix the Door Back
After you are done with planing it’s time to rehang the door. Be careful here and give it a swing after the step is over.
There should be no sticking out issue now. If you see the problem is still there but much better than before, trim a bit more. Remove it once again and shave the required amount.
Do this until the results are satisfying. It should open and close perfectly. Once done, remove it again and sand, prime and paint the parts well.
Reinstall any removed hardware and then finally rehang the door for finishing off whole process.
Pro Tips
Use marking tape to mark the amount of wood. This will give you a clear place to work on. So that removal and chipping problems could be resolved easily.
For removing material and wood, use a belt sander. It should give you best results and also do the job quickly.
Sometimes a hand or electric planer can take more than enough time. This may also need extra effort for planing. However, they do really good for removing any extra part from the edge.
Some Safety Concerns
If you have previous no experience in woodworking, then dealing with planers and doors can be quite risky. Here main reason is that most of the door is made of composite material. These may be really tough to plane.
On the other hand, complete wooden made doors are easy to plane. So, if you believe the door is made from MDF, Masonite or plastic materials, its best to choose someone having enough experience in this planing job.
Another good reason is sometimes prehung doors are sagging and they actually do not need removal for planing. Some adjustments will make them work better and only someone with woodworking experience will be able to do it with shining results.
Also Read:
- Best Front Door Locks Reviews | Top Picks
- Best Door Closer Reviews | Automatic, Hydraulic, Commercial +
- Best Bedroom Door Lock Reviews | Top 6 Picks
- Best Door Lock Installation Kits | Top 5 Picks
- Best Door Handle set Reviews [Stylish & Durable]
- Best Exterior Doors For Direct Sunlight & Cold Weather
Verdict
The overall process on how to plane a door will need you to be a bit careful. The steps are daunting but hey, that’s the fun woodworkers love to have! If you are a beginner dealing with such issues or maybe learning, I’m sure the experience will be a great one.
Just make sure to have a proper someone with experience who can observe you and keep things safe. Good luck with your projects!